get a hobby, sonEveryone needs a hobby. We work to live (and I also think, in order to serve, but that's another blog). So many years ago I became interested in wood working.

I am not sure if it started by looking in those country arts shops and thinking to myself, "I could make a better wine holder than these". Then there were the beer coasters, bowls, turned pens, knife handles, cheese boards, and even kids toys from trains to cars to noisy rattles. Certainly I have a head full of ideas concerning different wooden bits and pieces which you could fill a shop with and sell for a tidy sum.
However, who has the time for that? You need to have the time and place to start churning out such items to sell. So instead of dedicating myself to such a profession, I just decided to dabble in all things woodworking. I found a hobby in it. Hence I bought and read a few books, dreamt of a few necessary work shed items to make, started collecting various basic tools, went to wood working shows, bought some wood, subscribed to a good woodworking magazine, and basically made plans.
"What did you make?", you may ask. At the start, not a great deal. Its slightly hard to throw yourself into building stuff if you live in an apartment. So when I returned to the home of my youth, I would dabble in this and that. Obviously, it is necessary to make something you can use to work on. So I firstly made a table.


This is a really beautiful European style woodworking table. You can find the plans for such a table on the net. I am unsure where I found the plans for this table. And sadly this isn't a table I have made.

Rather I made this smaller table. No lovely vices on the sides. No deep well at the back of the table for shavings and tools. No strong wood used to make a solid bench. The only benefit it had was its ability to fold up nicely and fit against a wall. The idea came from a $2 book I found at a liquidation sale. Although the plan was basic, I could adapt it enough to make it workable.

Sadly, my father got at it and basically painted it entirely white. I am not sure if this was to hide a few mistakes we'd made. It didn't really change the usefulness of the table. However any lovely joints or wood grain we might have accomplished were hidden under the colour. Nevertheless, it was a great and necessary project to start a woodworking hobby with.
the admissionBut I have an admission to make...
I suppose I have known the truth for some time. However this first major woodworking project forced me to make an honest assessment of my woodworking skills. Wood is a very unforgiving material to work with. The adage 'Measure twice, cut once' is very sound wisdom. If you make a mistake with wood, you'll mess up your work and unless you have an abundance of wood in store to replace mistakes, you'll see the mistakes forever.

So I am sad to admit, that
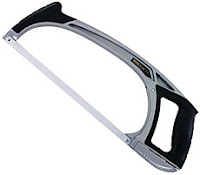
I am a sawing hack. As much as I practise and try, I can not saw a piece of wood straight. If the wood is marked with a straight edge, I will still wobble left and right, creating a dreadful cut. I have tried different saws, using the correct types for different cuts. I have tried standard styles and Japanese styles of saws - cutting on the push or cutting on the pull. However none of these help.
I am a sawing hack.
Thankfully, woodworking is more than just sawing. In answer to my failings, I have developed a range of skills to overcome my poor sawing abilities. I can leave excess wood, then use different tools like planes, sandpaper, or rasps, to bring the edges down straight. Overcoming such shortcoming and finding solutions are a few of the reasons I enjoy working with wood.
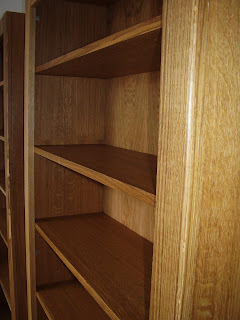
the bookshelvesObviously, there is also great joy in finish a job. For example, over two years I made three bookshelves. I have been subscribing to
Australian Woodsmith magazine for many years.

This is a great magazine, originally out of America, but adapted for Australia. They offer tips for all sorts of woodworking - from cutting wood to finishing it. They have detailed plans for several different type of projects - furniture, jigs, tools and so on. I was looking for a good bookcase project I could use and this magazine had a plan for a bookcase which you could adapt depending on the style you wanted (see
Australian Woodsmith 9:20-25). Instead of solid oak I used oak veneer plywood. I had to dress the front of the shelves, but it gave me the opportunity to use some solid wood.

After sanding the cases, I gave them a good drenching in linseed oil, then I used
Briwax as a protective coating (see
Australian Woodsmith 42:60-62). These bookcases were very satisfying to adapt and build. They took time to build as I was working out of someone else's backyard shed, which was impossible to work in during the European winter months. However once all the shelves and sides were ready, I could assemble them together in our flat. (I'm also thankful to the in-laws who helped with the oiling and waxing).
So what else have I dabbled in? I'll let you know in future blogs.
 I particularly enjoyed a few designs and yachts that were shown. The Halvorsens are a particularly beautiful craft, although I doubt a novice like myself could build one. It would be great to spend a week travelling up and down rivers in one of these boats.
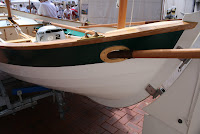
 Another magnificant craft on display was Whisper, a 10' clinker dinghy designed by Paul Gartside and built by Denman Marine. This beautiful dinghy is made out of Huon, King Billy, and celery top pine. The craftsmanship on this craft is exceptional.


